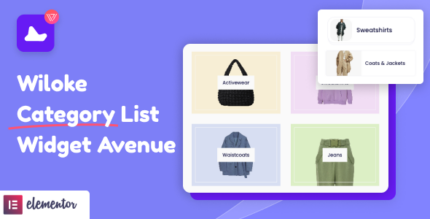
Innovative method for creating unique Workflow Cards
Wiloke Workflow is an Elementor plugin that provides a variety of process templates.
Simple, clear, and effective
Make beautiful Workflow cards and everything else you wish to highlight. Everything is pre-made for you, making it simple to use for both novice and professional designers. Simply select one of the process templates and provide the essential information.
One-of-a-kind Workflow cards for your business
Every card in the workflow layout is attractive and includes information like an ordinal, headline, explanation, and a link to the specifics. The Wiloke Workflow plugin’s functions are super simple to use, straightforward, and easily customizable. It enables users to develop their own processes within just some minutes.
Wiloke Workflow Envy Widget for Elementor is a premium widget specifically designed for the Elementor page builder. It helps enhance the functionality and appearance of websites built with Elementor by providing a powerful workflow management system in the form of visually appealing, customizable widgets. This widget is typically used by businesses that require a streamlined, visual workflow or project management system integrated into their website.
Here's a breakdown of the key features and functionalities of Wiloke Workflow Envy Widget for Elementor:
Key Features:
Workflow Management Visuals:
The Wiloke Workflow Envy Widget helps represent a workflow or process in a step-by-step visual format. This is useful for businesses that want to showcase their process to clients or users, such as project workflows, service processes, or step-by-step guides.
The widget allows you to display stages of a process, tasks to be completed, or even a series of steps with visually distinct elements like icons, arrows, and numbered steps.
Drag-and-Drop Workflow Builder:
With this widget, you can use Elementor’s drag-and-drop functionality to easily add and customize each step of your workflow. You can structure your workflow however you like, whether it’s linear, sequential, or more complex.
You can position and reorder workflow steps, add images or icons to represent tasks, and adjust text, colors, and other design elements to match your website’s aesthetic.
Customizable Workflow Items:
Wiloke Workflow Envy Widget comes with a high degree of customizability. Each step in the workflow can be styled individually, including the text, background color, icons, shapes, and font sizes. You can also adjust the layout of your workflow, such as the alignment (horizontal or vertical) of the steps.
The widget gives you complete control over the design, allowing you to match the workflow with your brand identity and website’s theme.
Pre-Designed Templates:
The widget comes with pre-designed templates for common workflow structures. These templates serve as a great starting point and can be easily customized to fit your specific requirements.
Whether you need a simple 3-step process or a more complex multi-step process, there are templates for different types of workflows that you can use and adapt.
Icons and Images Integration:
You can enhance your workflow steps by integrating icons or images. Icons can represent different steps or tasks within the workflow, making it more visually engaging and easier for users to understand.
You can choose from a library of icons, or upload your own custom images to visually represent your process.
Responsive Design:
The widget is fully responsive, ensuring that your workflow looks great on all devices, including desktops, tablets, and mobile phones. The steps automatically adjust to fit the screen size, maintaining an optimal user experience across all devices.
The mobile optimization ensures that users can view the workflow without issues on smaller screens, which is crucial for improving mobile user engagement.
Animation Effects:
The widget allows you to add animation effects to the workflow steps. You can animate each step to appear in a sequence, use hover effects, or implement smooth transitions when users scroll through or interact with the workflow.
This feature makes the workflow more dynamic and engaging, which can help capture the attention of users and guide them through the process more effectively.
Custom Links for Each Step:
You can add custom links to each step of the workflow. This means users can click on specific workflow items to be directed to relevant pages or sections of your website for more details or further actions.
This is particularly useful for providing detailed information about each stage of the workflow, such as linking to a service page, product details, or an FAQ section.
Flexible Layout Options:
The widget supports various layout options, such as vertical, horizontal, or grid-based workflows. This gives you the flexibility to design a workflow that fits your website’s layout and content strategy.
You can choose how the steps are arranged and how they interact with other content on your page.
Typography and Styling Control:
You can control typography settings, such as font family, size, color, weight, and spacing. This allows you to ensure that the text in your workflow matches the overall style of your website.
The styling controls enable you to adjust the borders, padding, margins, and shadows of the workflow steps to create a visually polished and professional look.
User-Friendly Interface:
The widget is integrated seamlessly into the Elementor page builder, making it easy for even beginners to use. The drag-and-drop interface, combined with simple controls, allows users to create a custom workflow without needing to know any code.
The user-friendly setup ensures that the widget can be implemented quickly and easily without technical expertise.
Ideal For:
Service Providers: Agencies or service providers who want to showcase their process or workflow (e.g., marketing strategies, project steps, design phases, etc.) can use this widget to visually explain the steps involved in their services.
Consultants and Coaches: Professionals like business consultants, life coaches, and other consultants can use the widget to visually represent their step-by-step methodology or the process they follow in working with clients.
E-commerce Websites: E-commerce sites can use this widget to show the process from product selection, cart checkout, and delivery steps, helping customers understand the buying process more clearly.
SaaS and Tech Companies: Software-as-a-service (SaaS) providers or tech companies can use this widget to show product usage steps, onboarding processes, or troubleshooting guides in a clear and interactive way.
Educational Websites: Educational websites or e-learning platforms can implement workflows to guide users through lesson plans, course completion steps, or certification processes.
How to Use:
Install the Widget:
To use Wiloke Workflow Envy Widget, you must have the Elementor page builder installed on your WordPress website.
Once you’ve installed and activated Elementor, download and install the Wiloke Workflow Envy Widget plugin.
You can install it via the Plugins > Add New section of the WordPress dashboard or upload it manually.
Add the Widget to Your Page:
After installation, create or edit the page where you want to display the workflow using Elementor.
From the Elementor sidebar, search for the Wiloke Workflow Envy Widget. Drag and drop the widget to the desired section of your page.
Customize the Workflow:
Once you have the widget on the page, you can start customizing the workflow. You can add new steps, modify the text and titles for each step, change the icons or images, and set up any links for additional details or actions.
Use the Elementor panel to control the design, such as adjusting layout, spacing, colors, and typography.
Preview and Publish:
After you’ve finished customizing the widget, preview the page to ensure the workflow looks great across all devices (desktop, tablet, mobile).
Once you’re satisfied with the design, publish the page to make it live on your website.
Conclusion:
The Wiloke Workflow Envy Widget for Elementor is a powerful tool that allows website owners to visually represent processes, services, or workflows in a dynamic and customizable manner. With its wide range of design options, user-friendly interface, and mobile optimization, it’s ideal for businesses in various industries looking to present complex workflows in an engaging and clear format. Whether you run a service business, SaaS, e-commerce site, or educational platform, this widget can enhance your user experience and help customers easily understand your processes.
(Only For Premium Category Products !)
1. All digital products are the most recent version, with no possibility of free updates. After payment, you can request an update to the most recent version for 5 days if a new version is released. We free support within 5 days.
2. If a license is required (Excludes WHMCS license , we provide only method not license), please contact us via email or ticket for assistance with activation. Our license is only valid for activation and does not include support.
3. We provide Mobile, PHP script installation services for $19.90 / ₹1700. Please create a backup after installation as we do not support re-installation. For mobile app source code, we do not offer installation services.
5. Please note that any digital products presented on the website do not contain malicious code, viruses or advertising. You will receive the original files from the developers. We do not sell any products that have been downloaded from other websites.
6. The response time can last up to 6 hours.
(Only For Membership Category Products !)
Benefits of our Membership Plans
Instant access to all plugins and all themes including all future releases
Unlimited domain usage
Regular Updates as of when available. Usually, updates are released daily.
If you have any questions, please first read the FAQs.
If you haven’t found the answer to your question, please contact us, and we will respond ASAP.
Please note that any digital products on the website do not contain malicious code, viruses, or advertising. We buy the original files from the developers. We do not sell any products downloaded from other sites.
Buy or download for FREE by subscribing to our VIP Membership Plan. Join the club of more than 1100+ happy members. This is the same theme as sold by the developer.
Updates:
We offer frequent updates for one year from the date of purchase. After this period, you have to purchase the item again to receive further updates, we also offer lifetime updates as a second option.
We regularly update products as soon as we are notified about an update, we go and download it from the author and update it on our site, but In case the current version of the product is not the latest, You can request an update for the product by contact form.
We send regular emails advising when products have been updated so please be sure to provide an active email address when you sign up.
Support:
Our support team is available 24/7, if you have any questions or need help in installing or configuring digital products purchased on the website, please don’t hesitate to contact form.
Please note that we are not developers of the provided products, so our technical support capabilities are limited. We do not change product functionality and do not fix developer bugs.
If you have any questions, please first read the FAQs.
If you haven’t found the answer to your question, please contact us, and we will respond ASAP.
Please note that any digital products on the website do not contain malicious code, viruses, or advertising. We buy the original files from the developers. We do not sell any products downloaded from other sites.